Background Concept
Heart shape is a very common drawing in any canvas. This canvas can be a paper, drawing board and why not an Android canvas. So let us make a heart shape View in android using some mathematical calculations. Bezier curve are very fundamental for drawing curve of any order like basic line, quadratic, cubic or higher order curve.
I have used cubic bezier curve to draw the heart shape. To draw a cubic bezier curve you need total four points start point, two control points and end point. Below picture would provide some inputs to understand these points. Please go to the wikipedia page to better understand the bezier curve drawing.
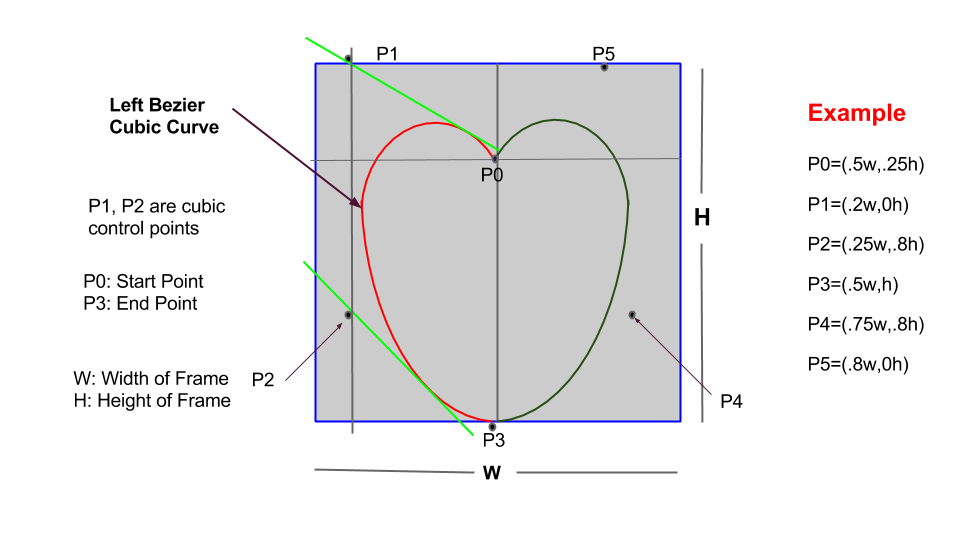 According to the above picture, there are two cubic bezier curve that I have used. The left curve is colored in red and right curve colored in green. I in the above picture point, P0 is the start point and P3 is the end point for both left and right bezier curves. Points P1 and P2 are control points for left curve and points P4 and P5 are for right curve. I have provided a sample for these points. These points can be changed to change the shape of the heart shape like left part curve can be bigger than right part one or it can be skewed.
Demo Application
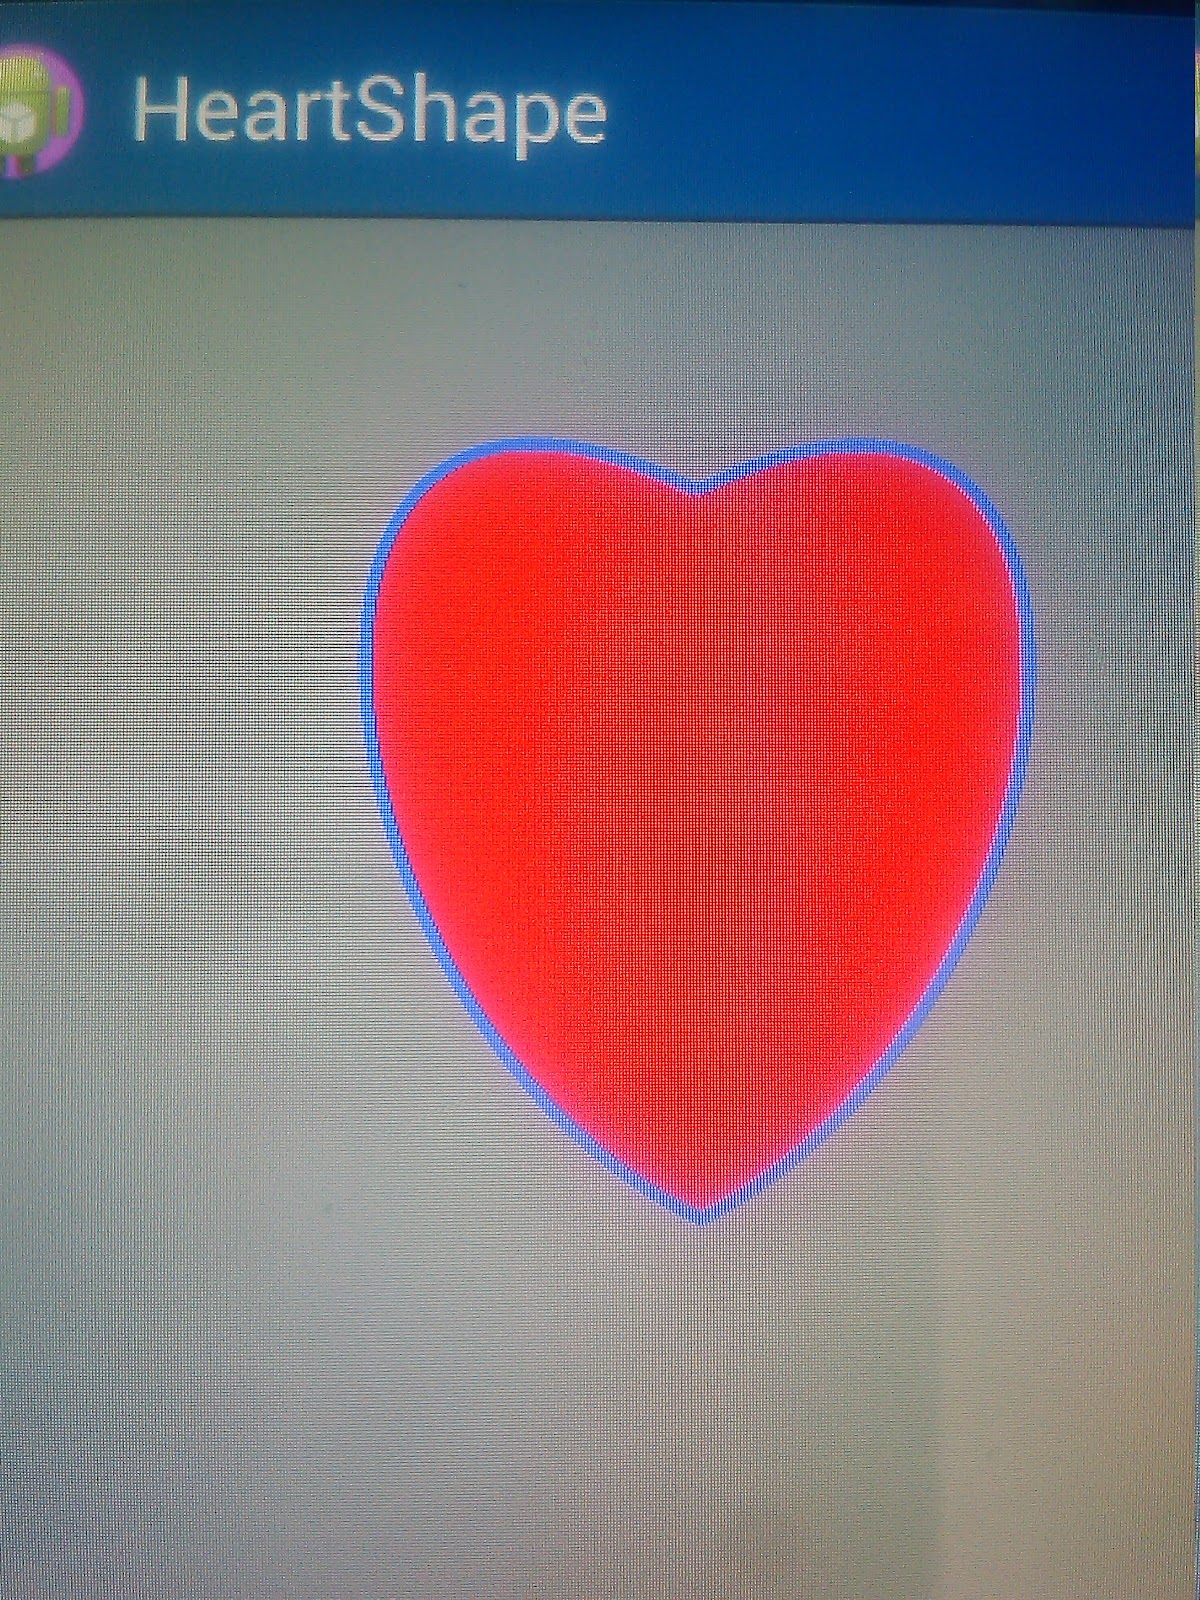
This is all about the the mathematics behind the shape drawing. Let us use this concepts and make an Android Custom View. In this android demo application, I have created a custom view by extending the View class. This custom view is then used inside the MainActivity class. The method call setContentView (View) is used inside the onCreate method of MainActivity class.
In custom view, MyHeartShape I have used Path and Paint android API to draw the shape. Path provide the shape of drawing curves and I have added the bezier points to the Path method cubicTo to create the cubic bezier curve. This path instance is used to create both left and right part of the Heart shape. First add the left part points to the path instance and then the right part points. Paint is used to color the boundary and interior of the shape. I have used the same path to draw the boundary of the shape which is blue color.
Note: Initialize Path and Paint object inside the constructor of the class not inside the onDraw method. This is because onDraw method is very expansive as suggested by the Android official documentation.
MyHeartShape.java
package test.example.heartshape;
import android.content.Context;
import android.graphics.Canvas;
import android.graphics.Color;
import android.graphics.Paint;
import android.graphics.Paint.Style;
import android.graphics.Path;
import android.view.View;
public class MyHeartShape extends View{
private static int WIDTH = 500;
private static int HEIGHT = 300;
private Path path;
private Paint paint;
private int top;
private int left;
public MyHeartShape(Context context) {
super(context);
path = new Path();
paint = new Paint(Paint.ANTI_ALIAS_FLAG);
top=10;
left=10;
}
@Override
protected void onDraw(Canvas canvas) {
super.onDraw(canvas);
// Fill the canvas with background color
canvas.drawColor(Color.GRAY);
paint.setShader(null);
// Defining of the heart path starts
path.moveTo(left+WIDTH/2, top+HEIGHT/4); // Starting point
// Create a cubic Bezier cubic left path
path.cubicTo(left+WIDTH/5,top,
left+WIDTH/4,top+4*HEIGHT/5,
left+WIDTH/2, top+HEIGHT);
// This is right Bezier cubic path
path.cubicTo(left+3*WIDTH/4,top+4*HEIGHT/5,
left+4*WIDTH/5,top,
left+WIDTH/2, top+HEIGHT/4);
paint.setColor(Color.RED); // Set with heart color
//paint.setShader(shader);
paint.setStyle(Style.FILL); // Fill with heart color
canvas.drawPath(path, paint); // Actual drawing happens here
// Draw Blue Boundary
paint.setShader(null);
paint.setColor(Color.BLUE); // Change the boundary color
paint.setStrokeWidth(4);
paint.setStyle(Style.STROKE);
canvas.drawPath(path, paint);
}
}
|
MainActivity.java
package test.example.heartshape;
import android.app.Activity;
import android.os.Bundle;
public class MainActivity extends Activity {
@Override
protected void onCreate(Bundle savedInstanceState) {
super.onCreate(savedInstanceState);
//setContentView(R.layout.activity_main);
MyHeartShape heart = new MyHeartShape(this);
setContentView(heart);
}
}
|
Some of the additional changes those can be performed using the above Custom View are:
1. You can transform the heart shape using Matrix class and applying it to the path object.Transformation like scale or rotate the view etc.
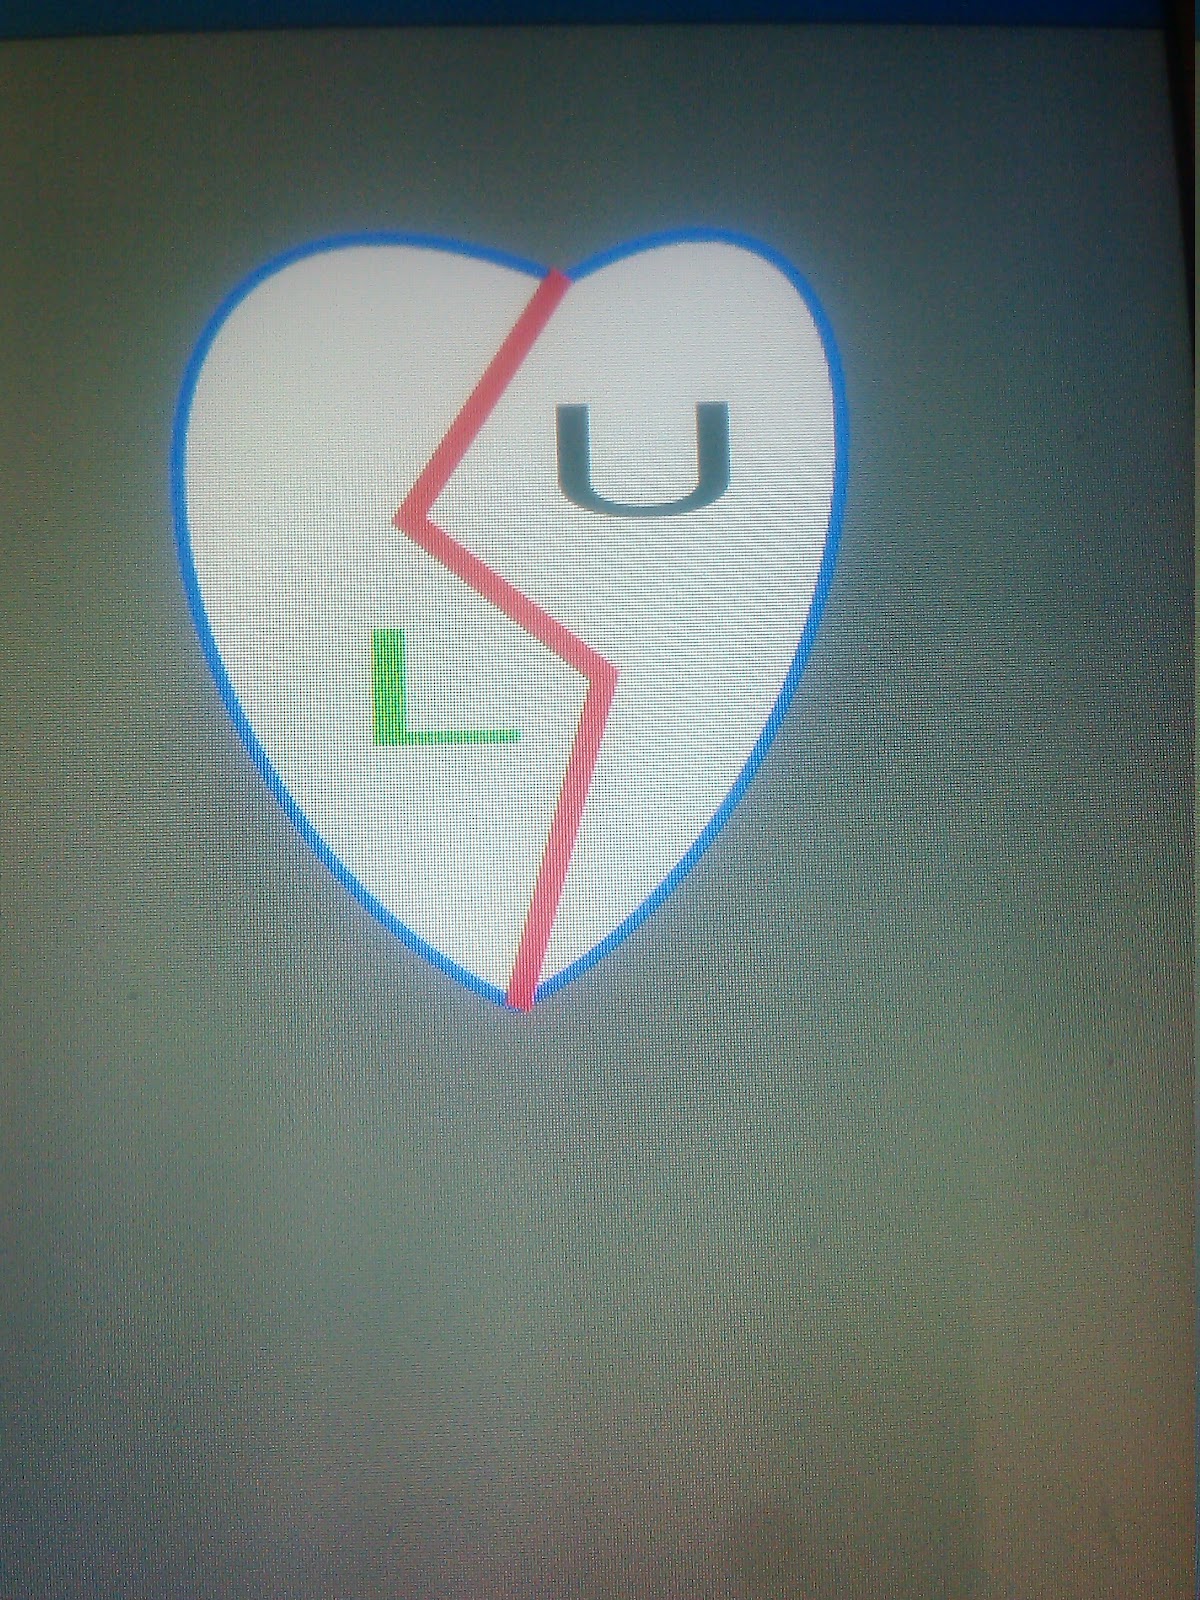
2. You can also make break heart by introducing a line from point P0 to point P3 and break the line into 2-3 parts.
3. You can add some text inside the view. You can create by own like below one.
Enjoy the custom drawing in Android.....;)
No comments:
Post a Comment